Tips for Building a Backyard Fire Pit
Since the Stone Age, human beings have harnessed the magic of fire. As one of the earliest human discoveries, we’ve used it in an amazing number of ways. From the onset, being able to control fire for cooking and heating have been two of its biggest selling points. Additionally, the heat and flames that make fire what it is have also been used to soften metal and stone for tool making, keep predators away, clear wooded areas for farming, and light our homes when the sun goes down. The use of fire also goes hand in hand with our social activities. Considered welcoming, warm, and cheery places to be, folks have been gathering around campfires, bonfires, and fireplaces for centuries.
Today’s homeowners are discovering that the inclusion of a firepit is a great way to extend the amount of time they can spend outside. From toasting marshmallows on the 4th to gathering around for ghost stories on a clear January evening, a firepit’s appeal definitely transcends the seasons. Before purchasing a freestanding one, bringing in a brick mason or going the DIY route, the addition of a firepit demands several key considerations.
Know the rules
Check into all of your local regulations that govern open fires on private property. They may be dictated by a variety of authorities, including your city, county, or neighborhood regulations and HOA rules. For example, some communities may require a minimum of a 10-foot distance between your house and surrounding neighbors’ yards. Others do not call for a permit if the firepit fits within allotted size requirements. However, in some areas, a site inspection is necessary. That way, local fire officials can make sure your proposed location is safe. Also be aware that many communities in drought-plagued areas have bans on open fires.
Where to put it
Find a spot a good distance from the house, deck, and any other wooden structures, such as fences and sheds. Make sure that the firepit is a safe space from all neighbors’ homes and their outside structures as well. Place it on a nonflammable material such as, cement, stone, brick, gravel, slate, or a fire-resistant composite.
Be aware that even if you will be using a screen or mesh cover, embers float up to the trees. Keep the firepit away from stands of trees and trim any nearby overhanging branches so they are a minimum of 15 feet from the ground.
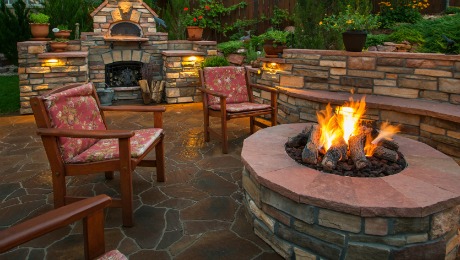
Make the firepit area appealing
Rather than simply creating a large circular spot in a usually dark corner of the yard, add a little extra light with solar charged lamps or outdoor LED lamps. This will help soften the area and make the firepit more of a focal point as opposed to an afterthought.
Also, research nonflammable seating options. Metal outdoor furniture comes to mind along with stone benches and stools. For anything that will be permanently installed, such as a low stonewall for seating, make sure that it is at least 2 feet away from the firepit.
Safety first
Although a firepit is an exciting addition, it is one that can be dangerous too! Please review these suggested precautions before beginning this project:
- Never light a fire without first checking the wind direction
- Never use flammable liquids to start or relight the fire-that includes gas, kerosene, lighter fluid, camp stove fuel, and mineral spirits
- Wear nonflammable clothing
- Never leave children unattended by the firepit
- Use seasoned hardwoods, rather than soft ones, such as pine or cedar that tend to pop and throw off sparks
- Have a safe way to dispose of ashes
- Keep a bucket of water or hose nearby in case the flames get out of control
- Check with your home owners insurance firm because, in some part of the country prone to drought, heavy winds, wildfires, it may be a requirement and impact your coverage.
Now that all of the serious considerations are out of the way, here are some great links for firepit designs and a few more for DIY instructions: